How To Create a Schedule
 You will need access to a desktop computer to get started on www.zortssports.com
Teams list (this list will need to be finalized to match the correct number of games per team)
Location Address
Divisions
Rules
Field Times / Game Times
Add staff to the roster for credentials
Review roster activity
*If any changes happen with teams or number of fields after the schedule is created the system will NOT save the changes automatically.Teams List
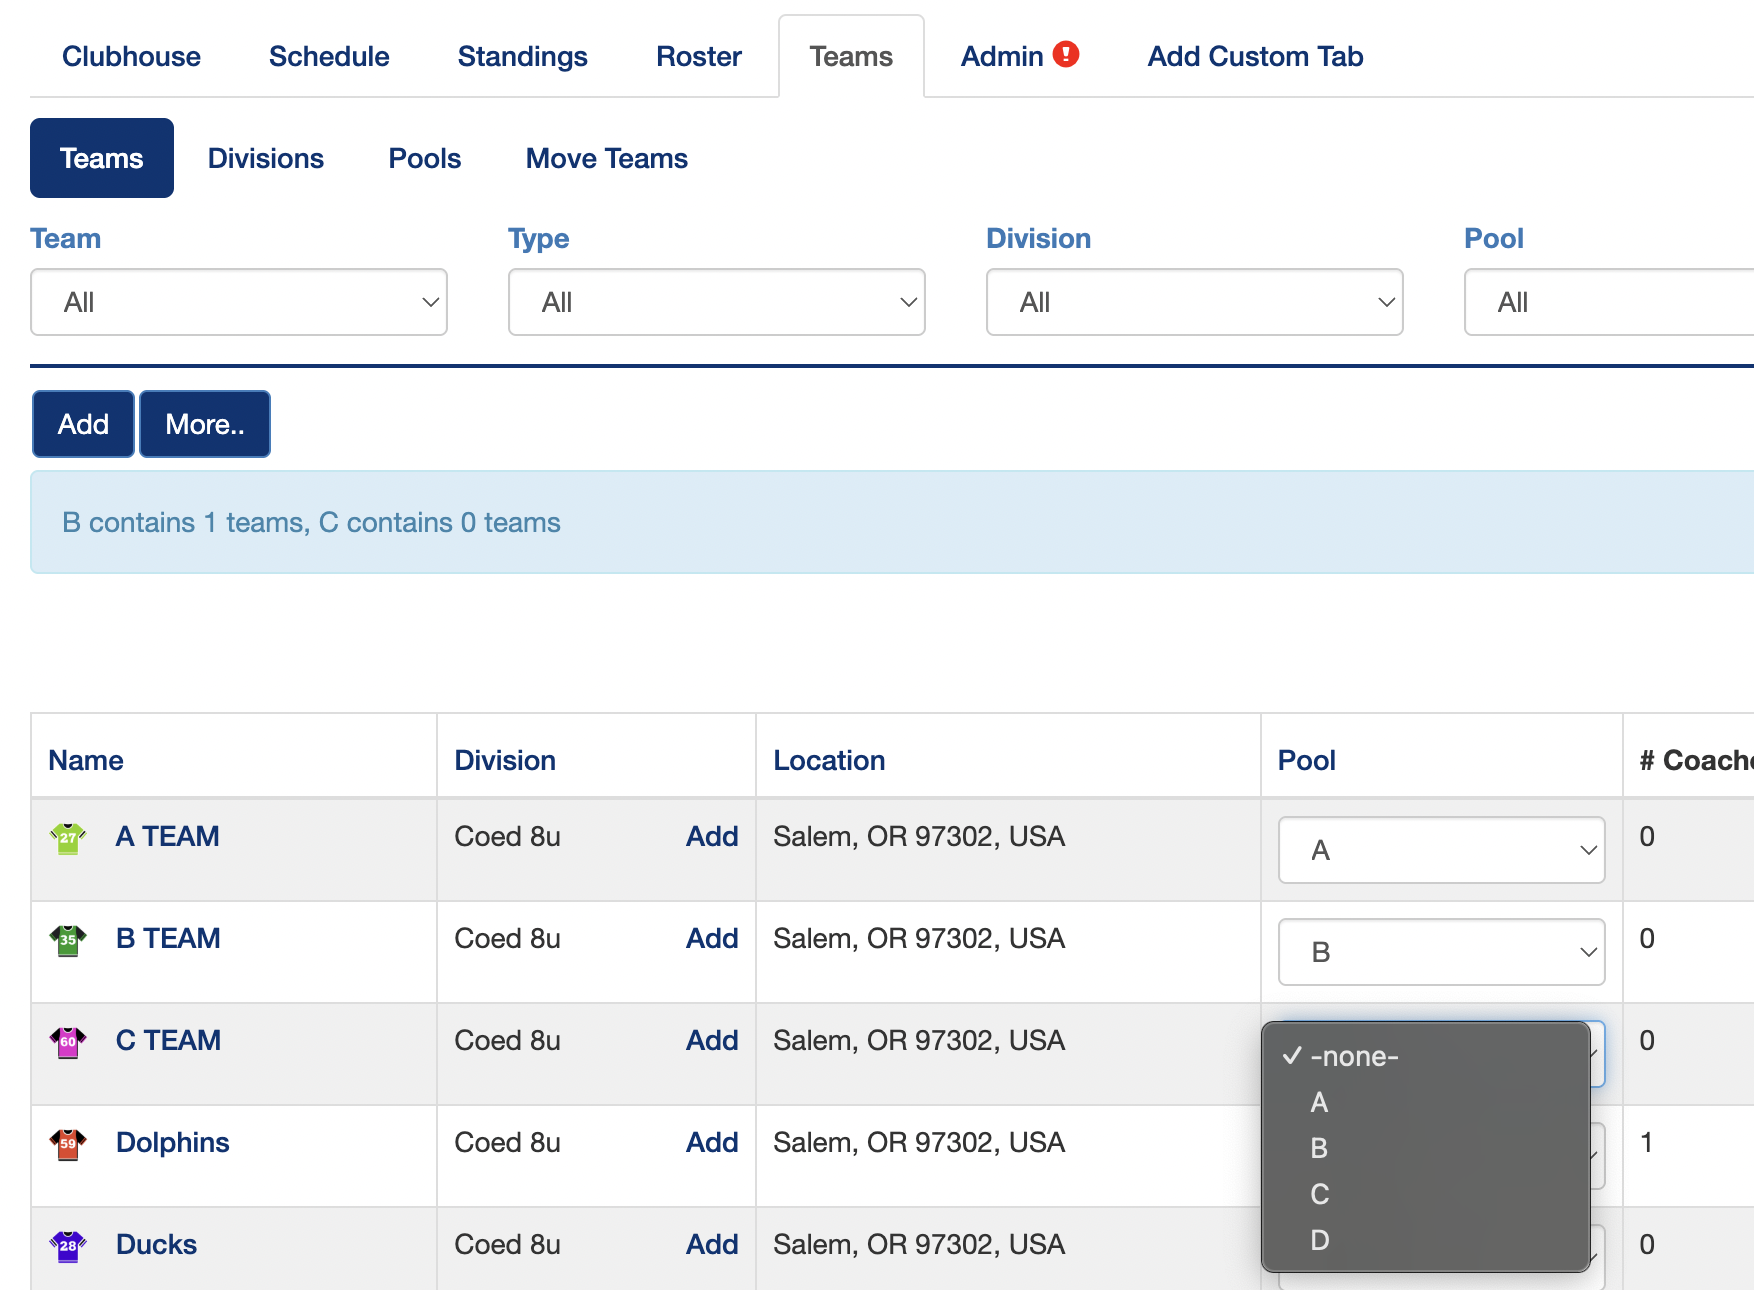
- Select 'Teams' tab, and the sub-tab labeled 'Teams'.
Team Pool Assignments

Team Pool Cross Over Games

How to Generate Round Robin (Pool Play) Games
When creating the round robin (pool play) games please refer back to the check list at the top of the page and check that you have the details finalized. Any changes made after the games are generated will NOT automatically update the schedule that was generated before.
Locate the Stages Tab:
Select the ‘Schedule’ > ‘Stages’ tab.
2. Click ‘Add’.
Format : Round Robin
Games Per Team : This is not including the next days games, if any.
Schedule Games : Yes
Back to Back : Yes
Fields/Courts : You can select all fields or the specific field you would like to have that division play on.
Fields/Courts Assignments : Use this feature when you have assigned teams to pools
Field Time Minutes : Total game time minutes including number of minutes for team to transition to next field.
Start Date / End Date : Review - if it is a two day event, this would be the day they will be playing the round robin games.
Start Time : The time the first game will start.
End Time : The end of field availability.
You will be redirected to the ‘Game Editor’ tab.
*To edit any match-ups manually, double click the home or away team and select from the drop-down teams list.
*To check your schedule progress you can view the field layout on the ‘Drag & Drop’ tab.
How to Enter Round Robin (Pool Play) Games Manually
When creating the round robin (pool play) games please refer back to Page 1 and check to make sure you have the details finalized. Any changes made after the games are created will NOT automatically update the schedule that was created before.
Locate the ‘Game Editor’ tab.
Select the ‘Schedule’ tab, and the sub-tab labeled ‘Game Editor’.
Fill in the date, time, site, division, home, and visitor.
4. Select ‘Save’ to save your progress at any time.
How to generate Single / Double Elimination Games (Bracket Play)
The Format : Single/Double Elimination
Seeding Source : Automatic (After the last pool play game is scored)
Quantity of Brackets : 1
Teams Top : Leave as is
Schedule Games : Yes
Fields/Courts : You can select all fields or the specific field you would like that division to play on (you can adjust championship games on 'Drag & Drop'.)
Field Time Minutes : Total game time minutes including number of minutes for team to transition to next field.
Start Date / End Date : Review and if the event is longer that one day, it would be the day they will be playing the round robin games.
Start Time : Is to generate the first game starting at that time.
- Select 'Generate'.
- Select 'Save'.
How to review the brackets after generating
Below are a few thing that will help check the scheduled games :
The green checks : scheduled game start times - this can help you check the order and prevent them from overlapping.
How to refresh the Standings
- If you have completed inserting scores select 'Tools' / 'Regenerate'
- After, regenerating the standing, select 'Seed Bracket'.
- This will help generate the bracket and show correct seeding.
How to review the Schedule on Drag & Drop
To locate the Drag & Drop Tab:
- Select the 'Schedule' tab / sub-tab labeled 'Drag & Drop'.
The complete field layout for each event day will be available on this page.
We recommend using this tool to manually adjust any game's field time slot.
- Click and hold down the game you wish to move and drag the game over to the new desired time slot.
- The gray area on the left can also be used to hold unscheduled games while you work on the existing schedule.
- Each line is a 5 minute increment
- the fields are labeled with whatever names you chose.
- In the example you can see them labeled 1, 2, 3, 4, 5, and 6.

Once something is moved you will NOT be able to reverse it back to its original placement.
The system will NOT allow a game to be placed in the same time slot that one of the teams is already playing.
Related Articles
Create Promo/Discount Codes For Your Event
Below are step-by-step instructions on how to create a promo/discount code for the registration price of your event. 1. Navigate to http://zortssports.com, log into your account, and select your event. a. Use your 'Administrator' role to view your ...Changing Incorrect Scores
Below are step-by-step instructions on how to change an incorrect scoring on a past game. 1. Log into your account at www.zortssports.com 2. Select the event that needs editing. 3. Click the 'Schedule' tab. 4. Click the 'Score' button to the right of ...Creating Division Specific Eligibility
CREATING DIVISION SPECIFIC ELIGIBILITY You may have a need to create division specific eligibility. Meaning, you may want the 8u division to have different required age cutoff dates and Zorts Cards than a high school division, for example. You must ...Creating Grade Based Divisions
You may have a need to create grade based divisions for your event. Meaning, you may want a "Middle School" or "8th Grade" division, instead of having a division that is based on AGE. This must be done on your desktop by going to ...Changing Roles on ZORTS
Below are the step-by-step instructions on how to toggle between different roles on ZORTS. How to toggle between roles on the website Sign into your account at https://zortssports.com/ before completing the following steps. 1. Select the event you ...